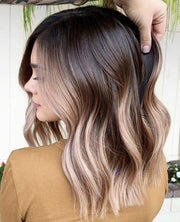
At home beauty regimes to keep you fabulous in isolation
It sure is a crazy time we’re living in, right? While there's plenty of serious stuff to think about, we've all had to face a harsh reality - one without our eyebrow lady to make everything better. Since we're all in isolation, why should it matter what our eyebrows look like? Well for many of us, our routines are what keep us sane and feeling like our best selves!
To keep you in check while you’re stuck at home like the rest of us, we’ve put together an at home beauty regime so you can come out on the flip side more fabulous than ever. The truth is, this is a crazy time and prioritising our mental health is especially important right now.
From setting up a backyard gym, to meditating, face masks, putting on makeup, and creating an at home beauty routine that brings salon-only beauty treatments to you. Anything that keeps you strong in your mind and practicing self love is essential, and you definitely shouldn’t feel guilty about it.
Overview:
- How to do your brows at home
- How to do your nails at home like a pro
- How to do laser hair removal at home
- How to do waxing at home by yourself
Bringing the salon to you with our at home beauty regimes
At home brows
While we all hold our eyebrow lady close to our hearts, you can’t see her right now (I’m not crying, you are). However, this does not mean that our brows are gonna lose control. We have an easy at home beauty routine to keep your eyebrows on fleek.
How to do your brows at home
From maintenance to tinting, we have you covered. All you need to keep your brow routine up to date is:
- 1000 Hour Eyelash & Brow Dye Kit
- BeautyPro Slant Tweezers
- BeautyPro Beauty Scissors
- BeautyPro Mascara Brush or spoolie
Step 1: The first step for this at home beauty routine is to tame and frame your eyebrows. Start by plucking any stray hairs underneath your brows using your tweezers. Be sure not to pluck into the body of your brow, as this could create sparse areas and change the shape.
Step 2: Next, take your spoolie and brush your brow hairs in an upward direction. Using your beauty scissors, carefully cut away any stray hairs from the top of your brow to create a smooth, straight edge.
Step 3: Once you have tamed the strays and shaped your brows, you can get to tinting. Start by following the instructions on the pack to get the formula ready, then apply some Vaseline directly on the skin around your eyebrows. This will protect the skin above and below your brows from getting stained.
Step 4: Apply the mixture to your eyebrows using the spoolie brush provided as you would apply a regular tinted brow gel. Leave for 10 minutes.
Step 5: After 10 minutes, use a dampened cotton bud to wipe away the excess dye and another dry cotton bud to remove the Vaseline.
Step 6: This tint will last you 4-6 weeks, so simply repeat this process when you need to!
At home nails
You may not be able to give yourselves acrylics, SNS or fancy nail art, but with the help of O.P.I you can still have well manicured nails during isolation.
How to do your nails at home like a pro
Getting your nails done is usually a time to just sit back and relax. So for this at home beauty routine, take this opportunity to smash a few episodes of your favourite Netflix show. Go all out and put on a face mask while you’re at it. All you will need is:
- O.P.I Start to Finish Base and Top Coat
- Your choice of nail polish
- O.P.I RapiDry Quick-Dry Top Coat
- O.P.I Infinite Shine Prostay Gloss Top Coat
- Nail clippers
- Nail file
- Cuticle cutters
- Hand cream
Step 1: The first step is prepping your nails. To do this, clip and file your nails to your desired length and shape. Also take the cuticle cutters to trim away any dry, excess skin around the base of your nails. Once you’re done, wash your hands with warm water and soap (for about 20 seconds because you know, #StopTheSpread) and dry.
Step 2: Next, apply the O.P.I Start to Finish Base & Top Coat on clean nails. As a base coat, this will help to prevent staining, strengthen your natural nails and provide a clean, smooth base for the application of your colour coat.
Step 3: Once the base coat has dried, apply your chosen nail polish colour and apply as usual. To help make your nail poish dry faster, apply a layer of the O.P.I RapiDry Quick-Dry after about 2 minutes.
Step 4: Once the colour coat is completely dry to touch, you want to apply your final top coat. You can use the O.P.I Start to Finish coat again, or if you want to add some extra shine for that fresh manicure feel, use the O.P.I Infinite Shine Prostay Gloss Top Coat. This will add 60% more gloss retention, 25% higher shine and help prevent chipping for longer lasting nails.
Step 5: Once your top coat has set, use your favourite hand cream to moisturise and you are done.
At home laser
Anyone who has had laser hair removal treatment will know that in order for it to work, it requires regular treatments every 4-6 weeks. Being in isolation however makes it difficult to keep up this routine… or does it? You guessed it, we have another at home beauty solution that will keep your hair away!
How to do laser hair removal at home
Laser hair removal at home is easier than people think, and it doesn’t involve the giant, obnoxiously loud machines you’re used to. All you need is one small gadget and that is the Go Bare IPL Hair Removal Hand Set.
This little baby offers safe, effective at home hair removal for any part of your body in just minutes (face and Brazilian included).
Step 1: Start by shaving the area you wish to treat with laser hair removal.
Step 2: Follow the instructions in the box to get your Go Bare IPL device ready and set to the intensity level you want (there are 7 options to choose from).
Step 3: Simply hold the device to the desired area and press the top button to apply gentle pulses of light into the hair roots. This will put the hair follicle into a resting phase, and result in a permanent decrease of hair growth. As with professional laser treatment, you will need to repeat this process until the entire area has been covered, being careful not to go over any areas more than once.
Step 4: For a silky smooth finish, apply some coconut oil to the area to add some moisture back to your skin. This treatment is slightly less intense than professional laser hair removal, so you can do this once every 2-3 weeks for best results.
At home waxing
If you’re less susceptible to pain and can get through frequent waxing sessions, then first of all, we envy you. But secondly, we know that you’re also concerned about not being able to have your regular session at the beauty salon, so this final at home beauty routine is just for you.
How to do waxing at home by yourself
This at home beauty treatment will take guts, but if you’re used to waxing you’ll be an instant pro. All you will need is a few products from our waxing collection that include:
How you use the wax and wax heater will vary depending on the one you choose, so we won’t go through the steps like we have with our other at home beauty treatments. In saying that, you get the idea - warm up the wax using your wax heater, apply the wax, rip it off, try not to scream/cry/give up. Easy.
We know that when it comes to these beauty treatments, no one else can do it like our special person can. So, we want to end this blog with a message to all the beauty therapists out there:
We appreciate you and we miss you. So, so much. However, please know that we are okay. We can manage on our own with these at home beauty regimes until social distancing is in the past and we can get back to our regular beauty schedules again! Xoxo
Now, go ahead and treat yourself! You can find all the products we mentioned, plus so much more at Oz Hair & Beauty - place your online order now!
You may also like:
categories